Jörmungandr - the Snake Game
A modern Snake Game
Project maintained by michalspano Hosted on GitHub Pages — Theme by mattgraham

Register
Story of the Jörmungandr
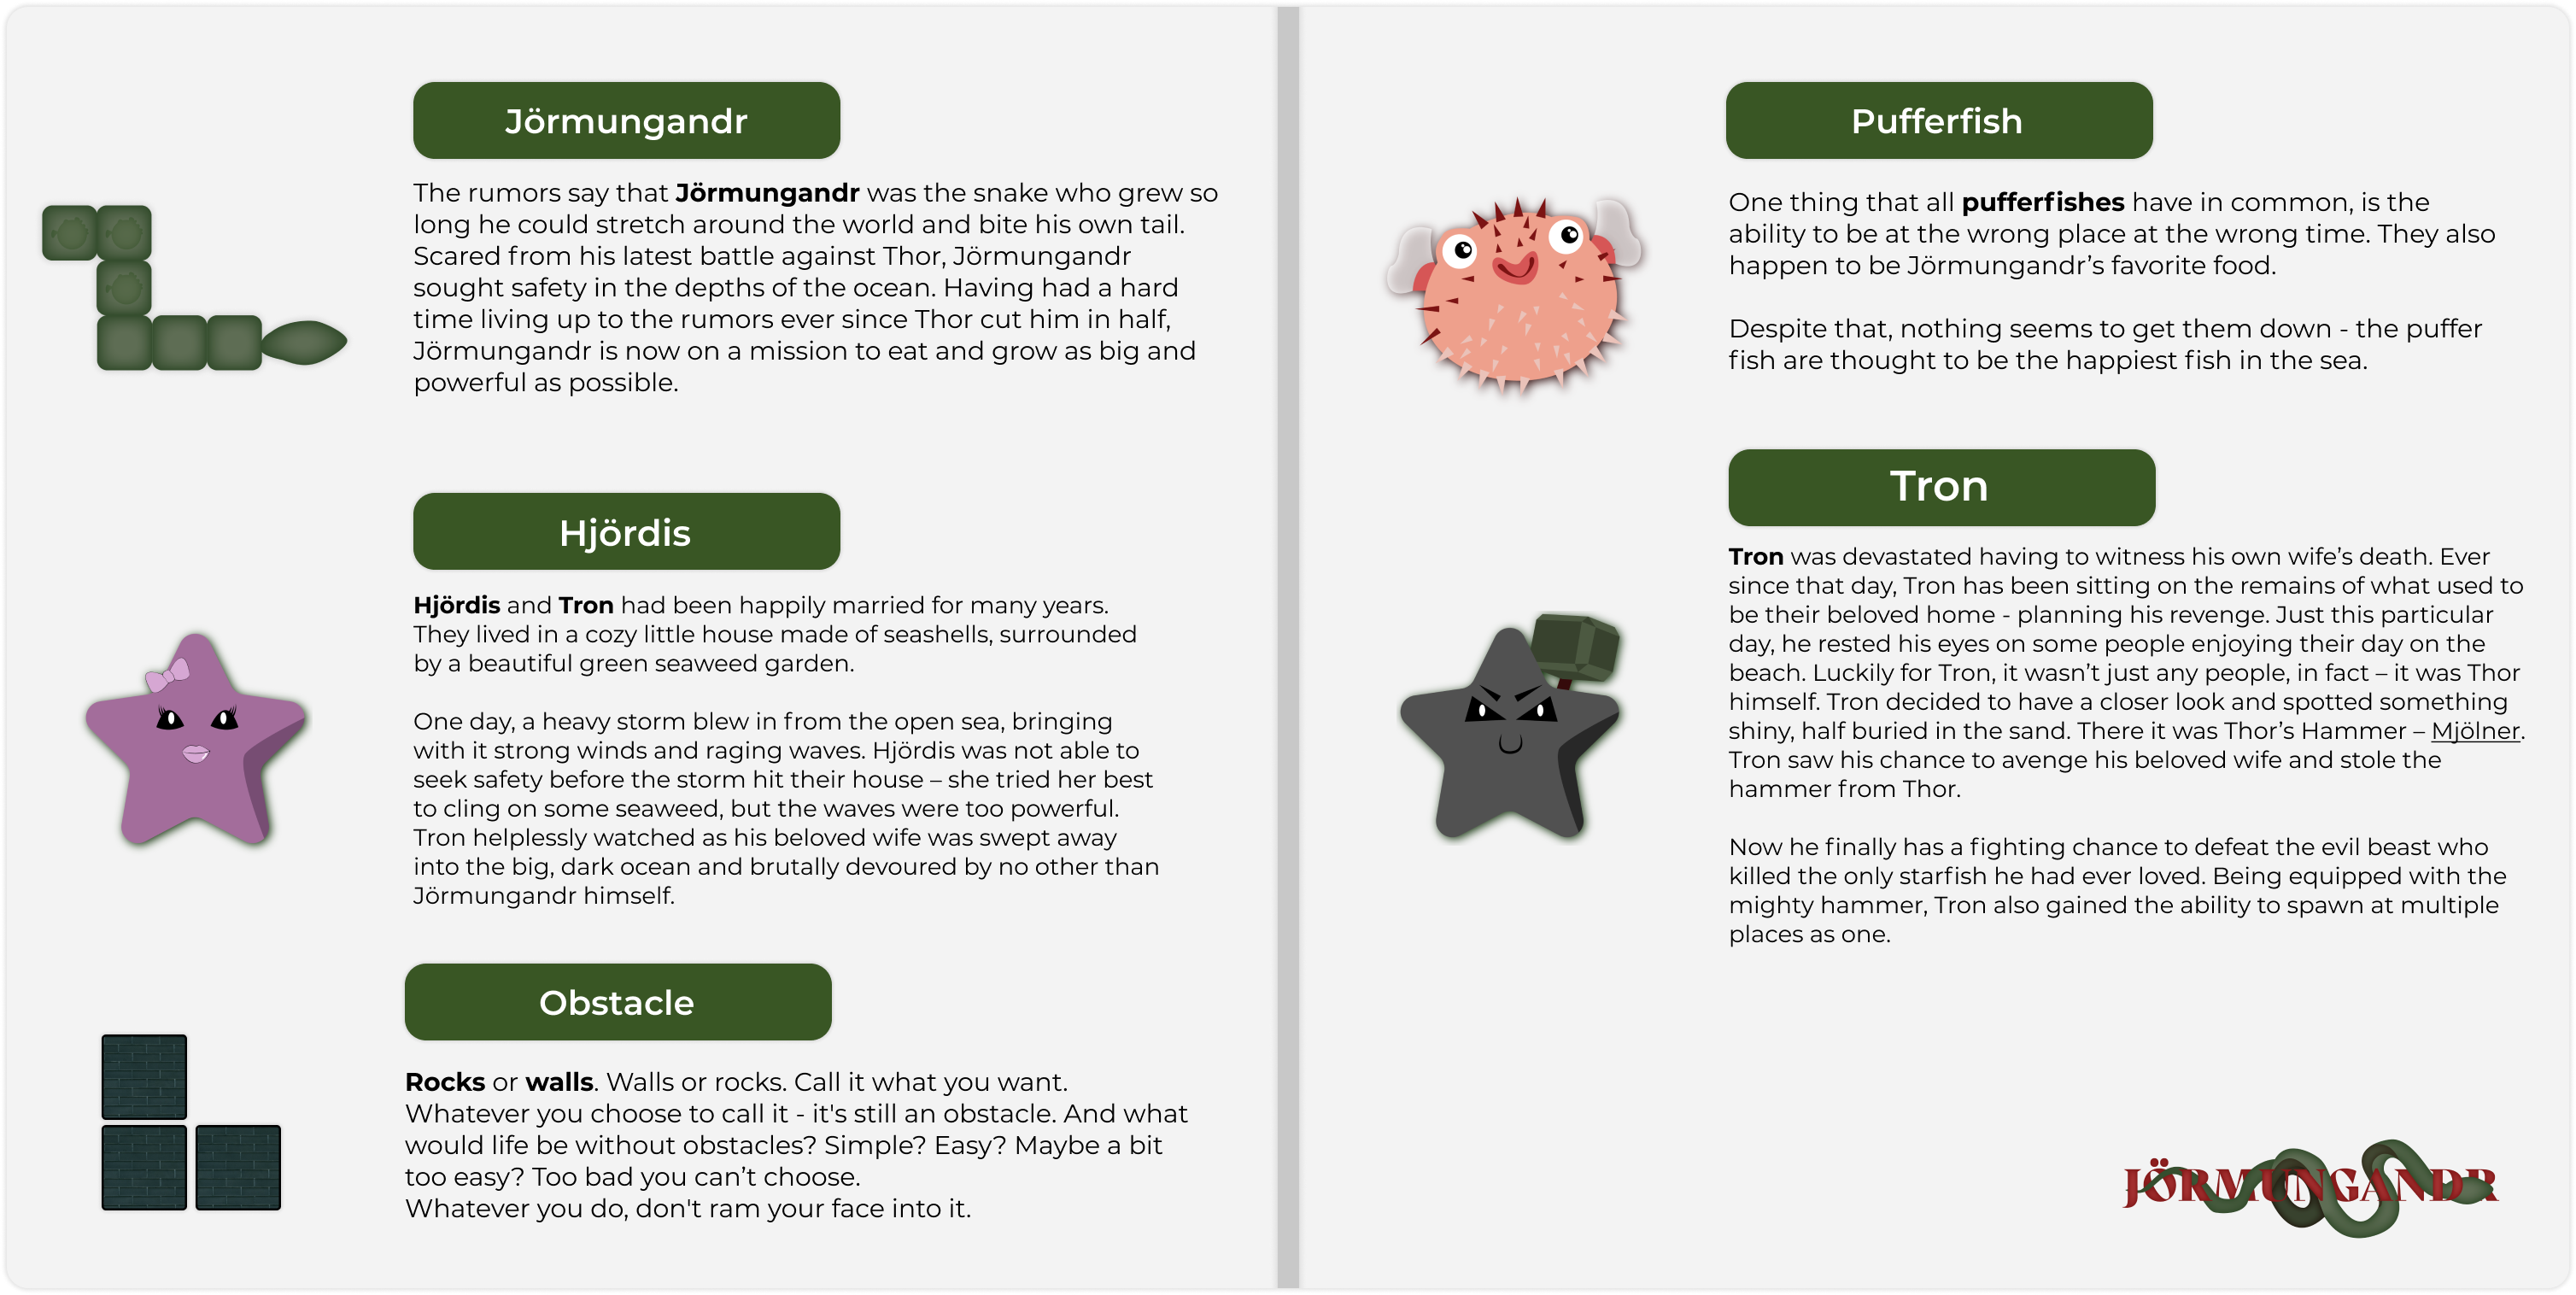
According to Scandinavian mythology, the Jörmungandr, also known as the World Serpent, is an enormous snake that lives in the world ocean circling the Earth. Jörmungandr is large enough to bite its own tail from the other side of the Earth.
Trying to find its way in the world ocean between the waves, and rocks, Jörmungandr catches pink puffer fish to consume, and grow length. Tron is obsessed with killing the giant snake, and therefore he has sent an army of starfish to destroy Jörnmungandr with their hammers.
Introduction
This is a user manual (UM) for the Snake Game - Jörmungandr - a game based on the traditional snake game with a few twists created by the Group 10 of DIT094 of the University of Gothenburg. It is intended to be used by the end user of the game, i.e. the player. Its major aim is to offer the player with the information needed to play the game and understand the game mechanics, as well as to supply the user with the information needed to install and use the game (within a local environment). Finally, as part of the game development process, the UM shall provide the user essential knowledge regarding the technical components of the game, such as the game architecture and the game design for potential future developers.
Installation
The game is tracked using a VCS (Version Control System), namely git; hence, it can be easily downloaded using the following command (assuming that git is installed on the user’s machine):
$ git clone https://github.com/michalspano/jormungandr.git # for HTTPS
$ git@github.com:michalspano/jormungandr.git               # for SSH
This command will create a local copy of the game on the user’s machine with all the source code therein. Optionally, since the source code of the software is published to GitLab, one can make use of the ‘Open in your IDE’ button to open the project in an IDE of their choice (e.g. IntelliJ IDEA) within the GitLab interface.
Project Structure, Dependencies and Requirements
The project’s developers tried to make the installation as easy as possible, therefore, the source code contains the configuration of the Build System used - Gradle - as well as other required configuration files. The configuration shall contain all the dependencies needed to run and/or build the game on a local machine.
However, the user needs to have a proper installation of JDK (Java Development Kit) on their machine. The game was developed using JDK 17 and it is recommended to use the same version. The user can download the JDK[1].
Moreover, it is advised to use an IDE for building and running the game. The developers used IntelliJ IDEA and it is recommended to use the same IDE. The user can download IntelliJ IDEA[2] (later throughout the document, the term IDE will refer to IntelliJ IDEA; version: 2022.2.3).
Running/Building the Game
As mentioned previously, the game is built using Gradle and the configuration files are included in the source code. Within the IDE, the user can run the game by clicking on the Run button (selecting snake (default) as the configuration; the levels sub-folder will be later explained in the subsequent chapter), or build the game by clicking on the Build button (selecting snake (default) as the configuration). This will only turn to be successful if the user has a proper installation of JDK on their machine and the JDK is properly configured within the IDE.
Game Interface
The game consists of three main screens: the Menu, the Game and the GameOver screen. The following section highlights such screens with the mechanics as well as additional information regarding the game at the given screen.
Menu
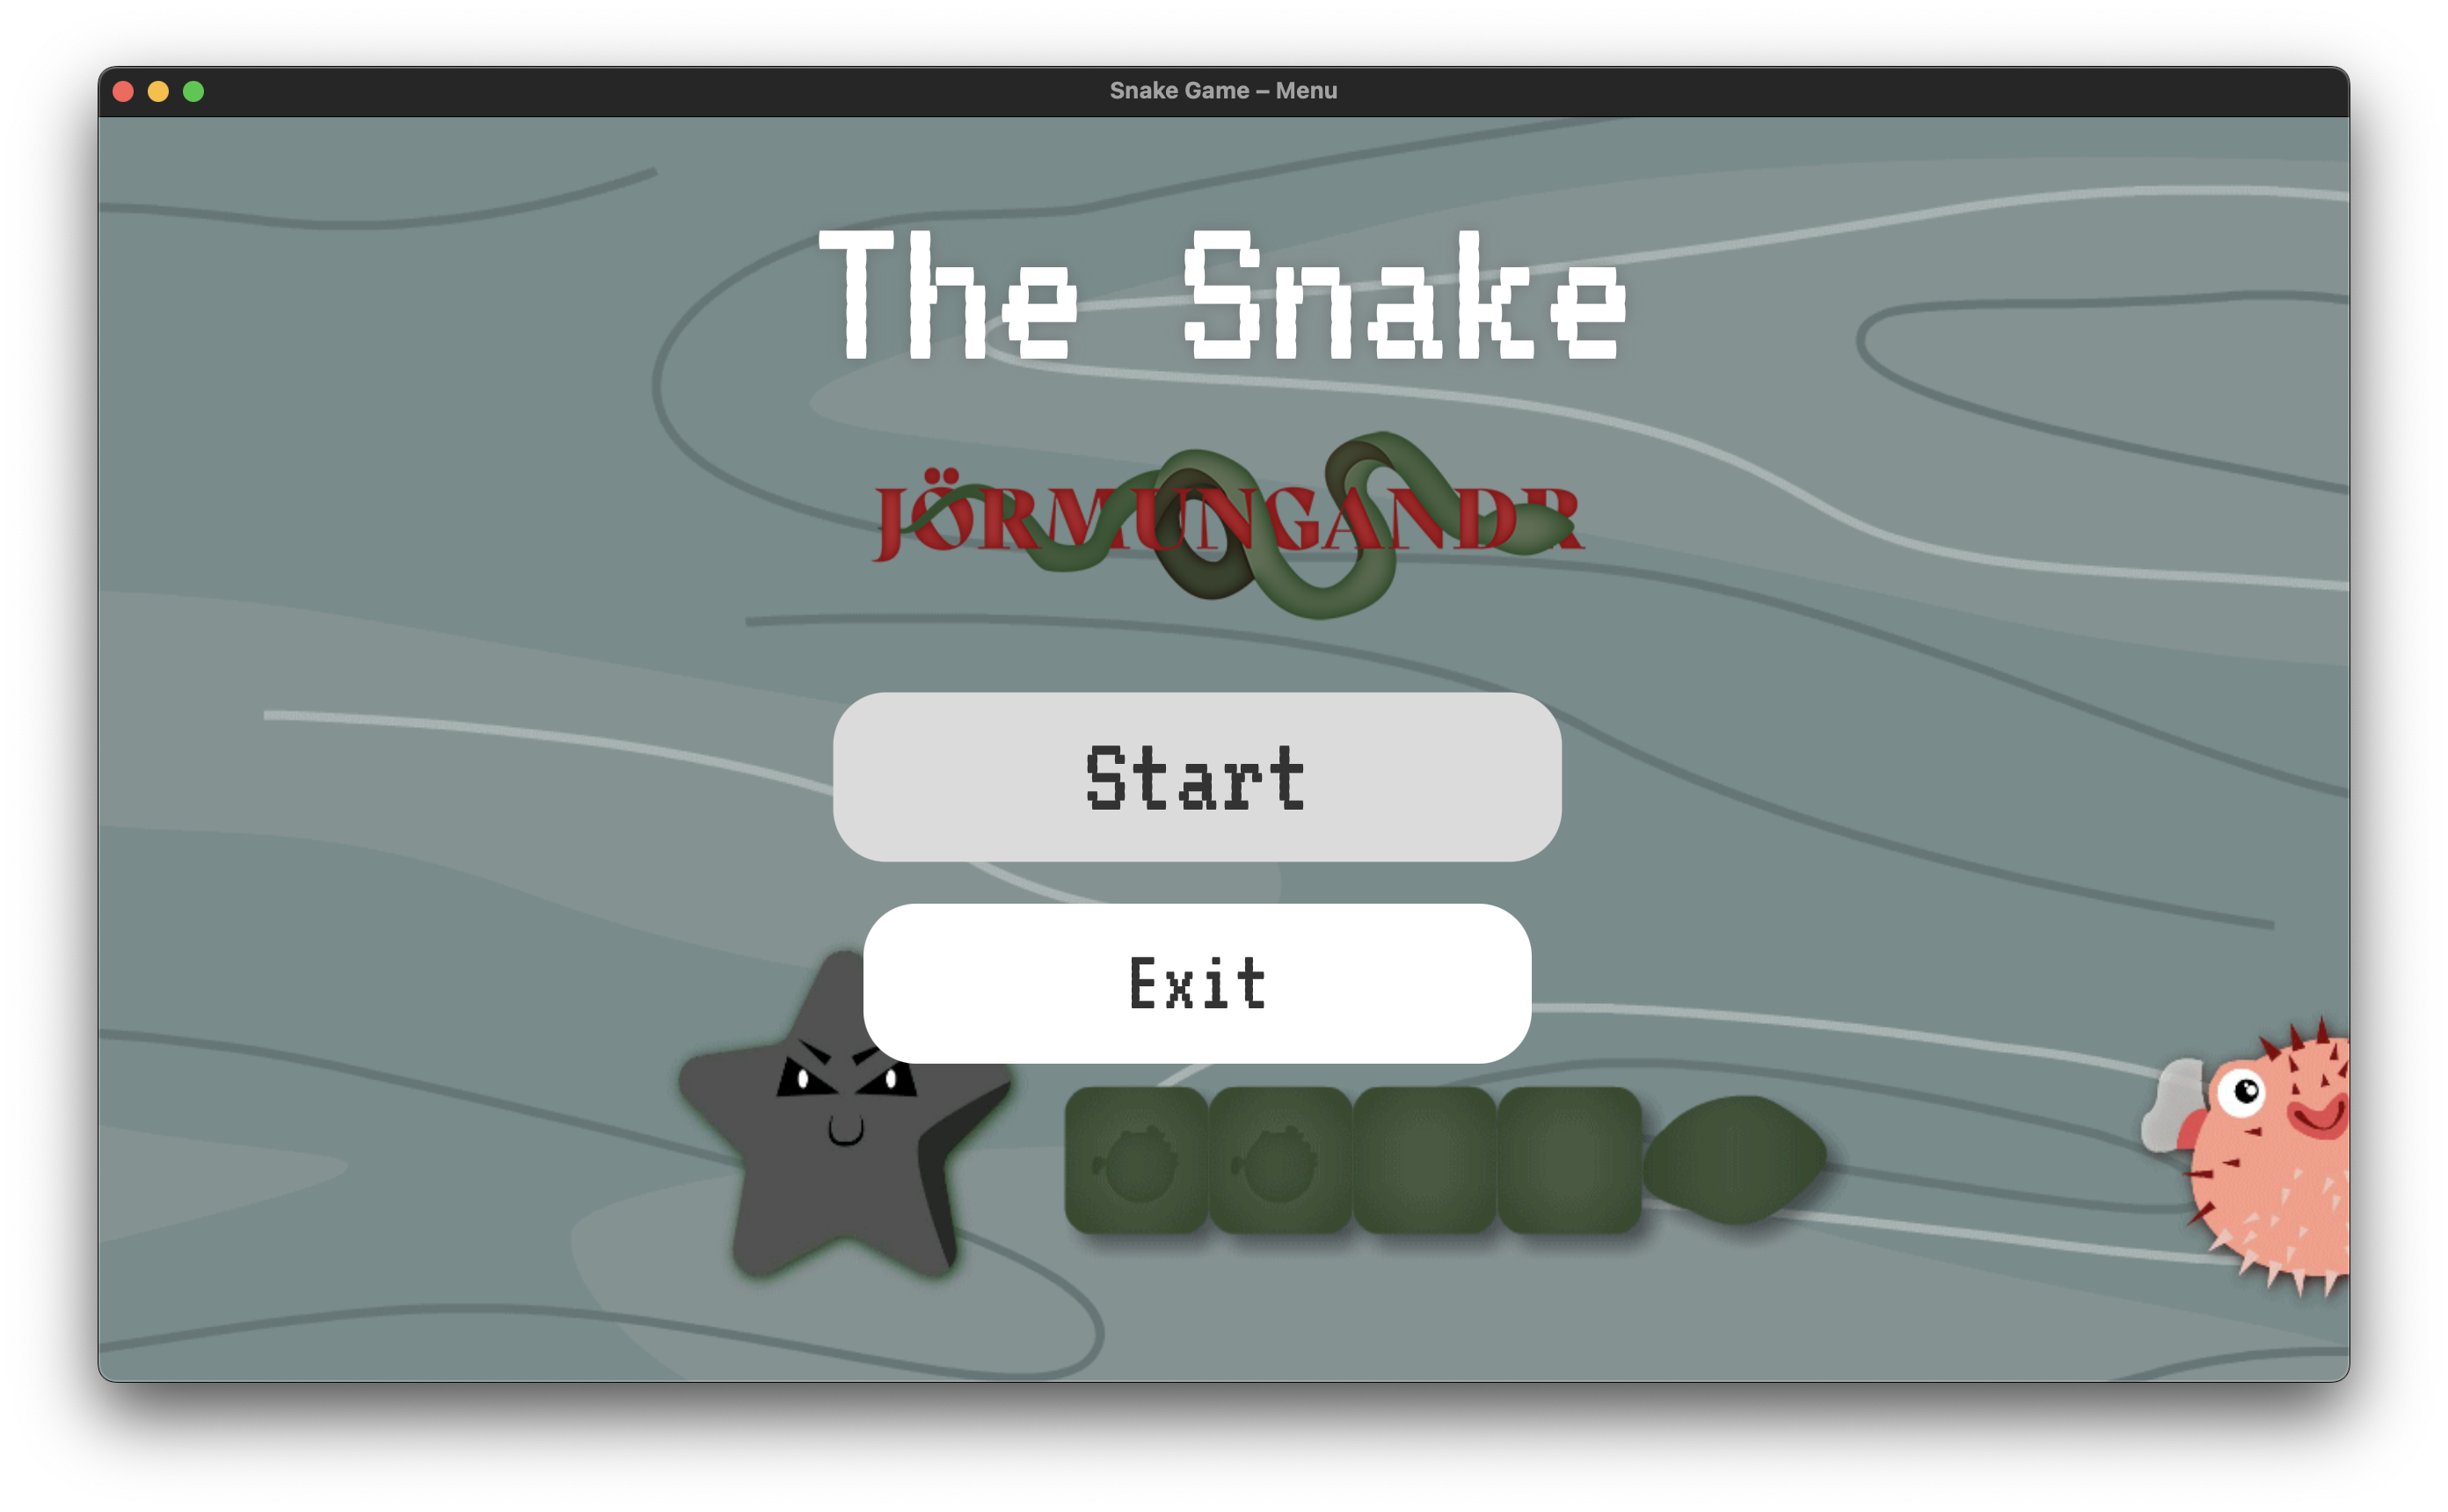
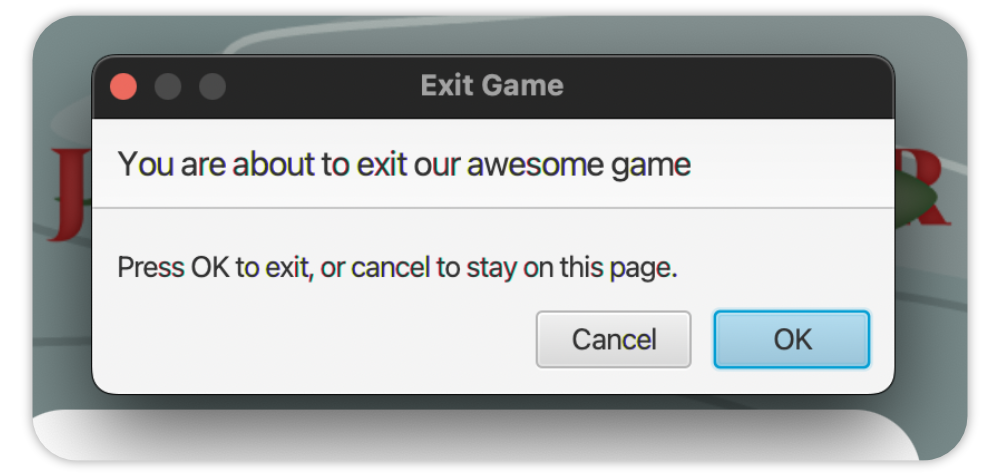
The user is welcomed with a background animation as well as a menu with two buttons: Start and Quit. The Start button starts the game, whereas the Quit button closes the game. The user can also close the screen with the x button in the top corner (a confirmation dialog will be shown). This applies to all the screens in the game.
Game
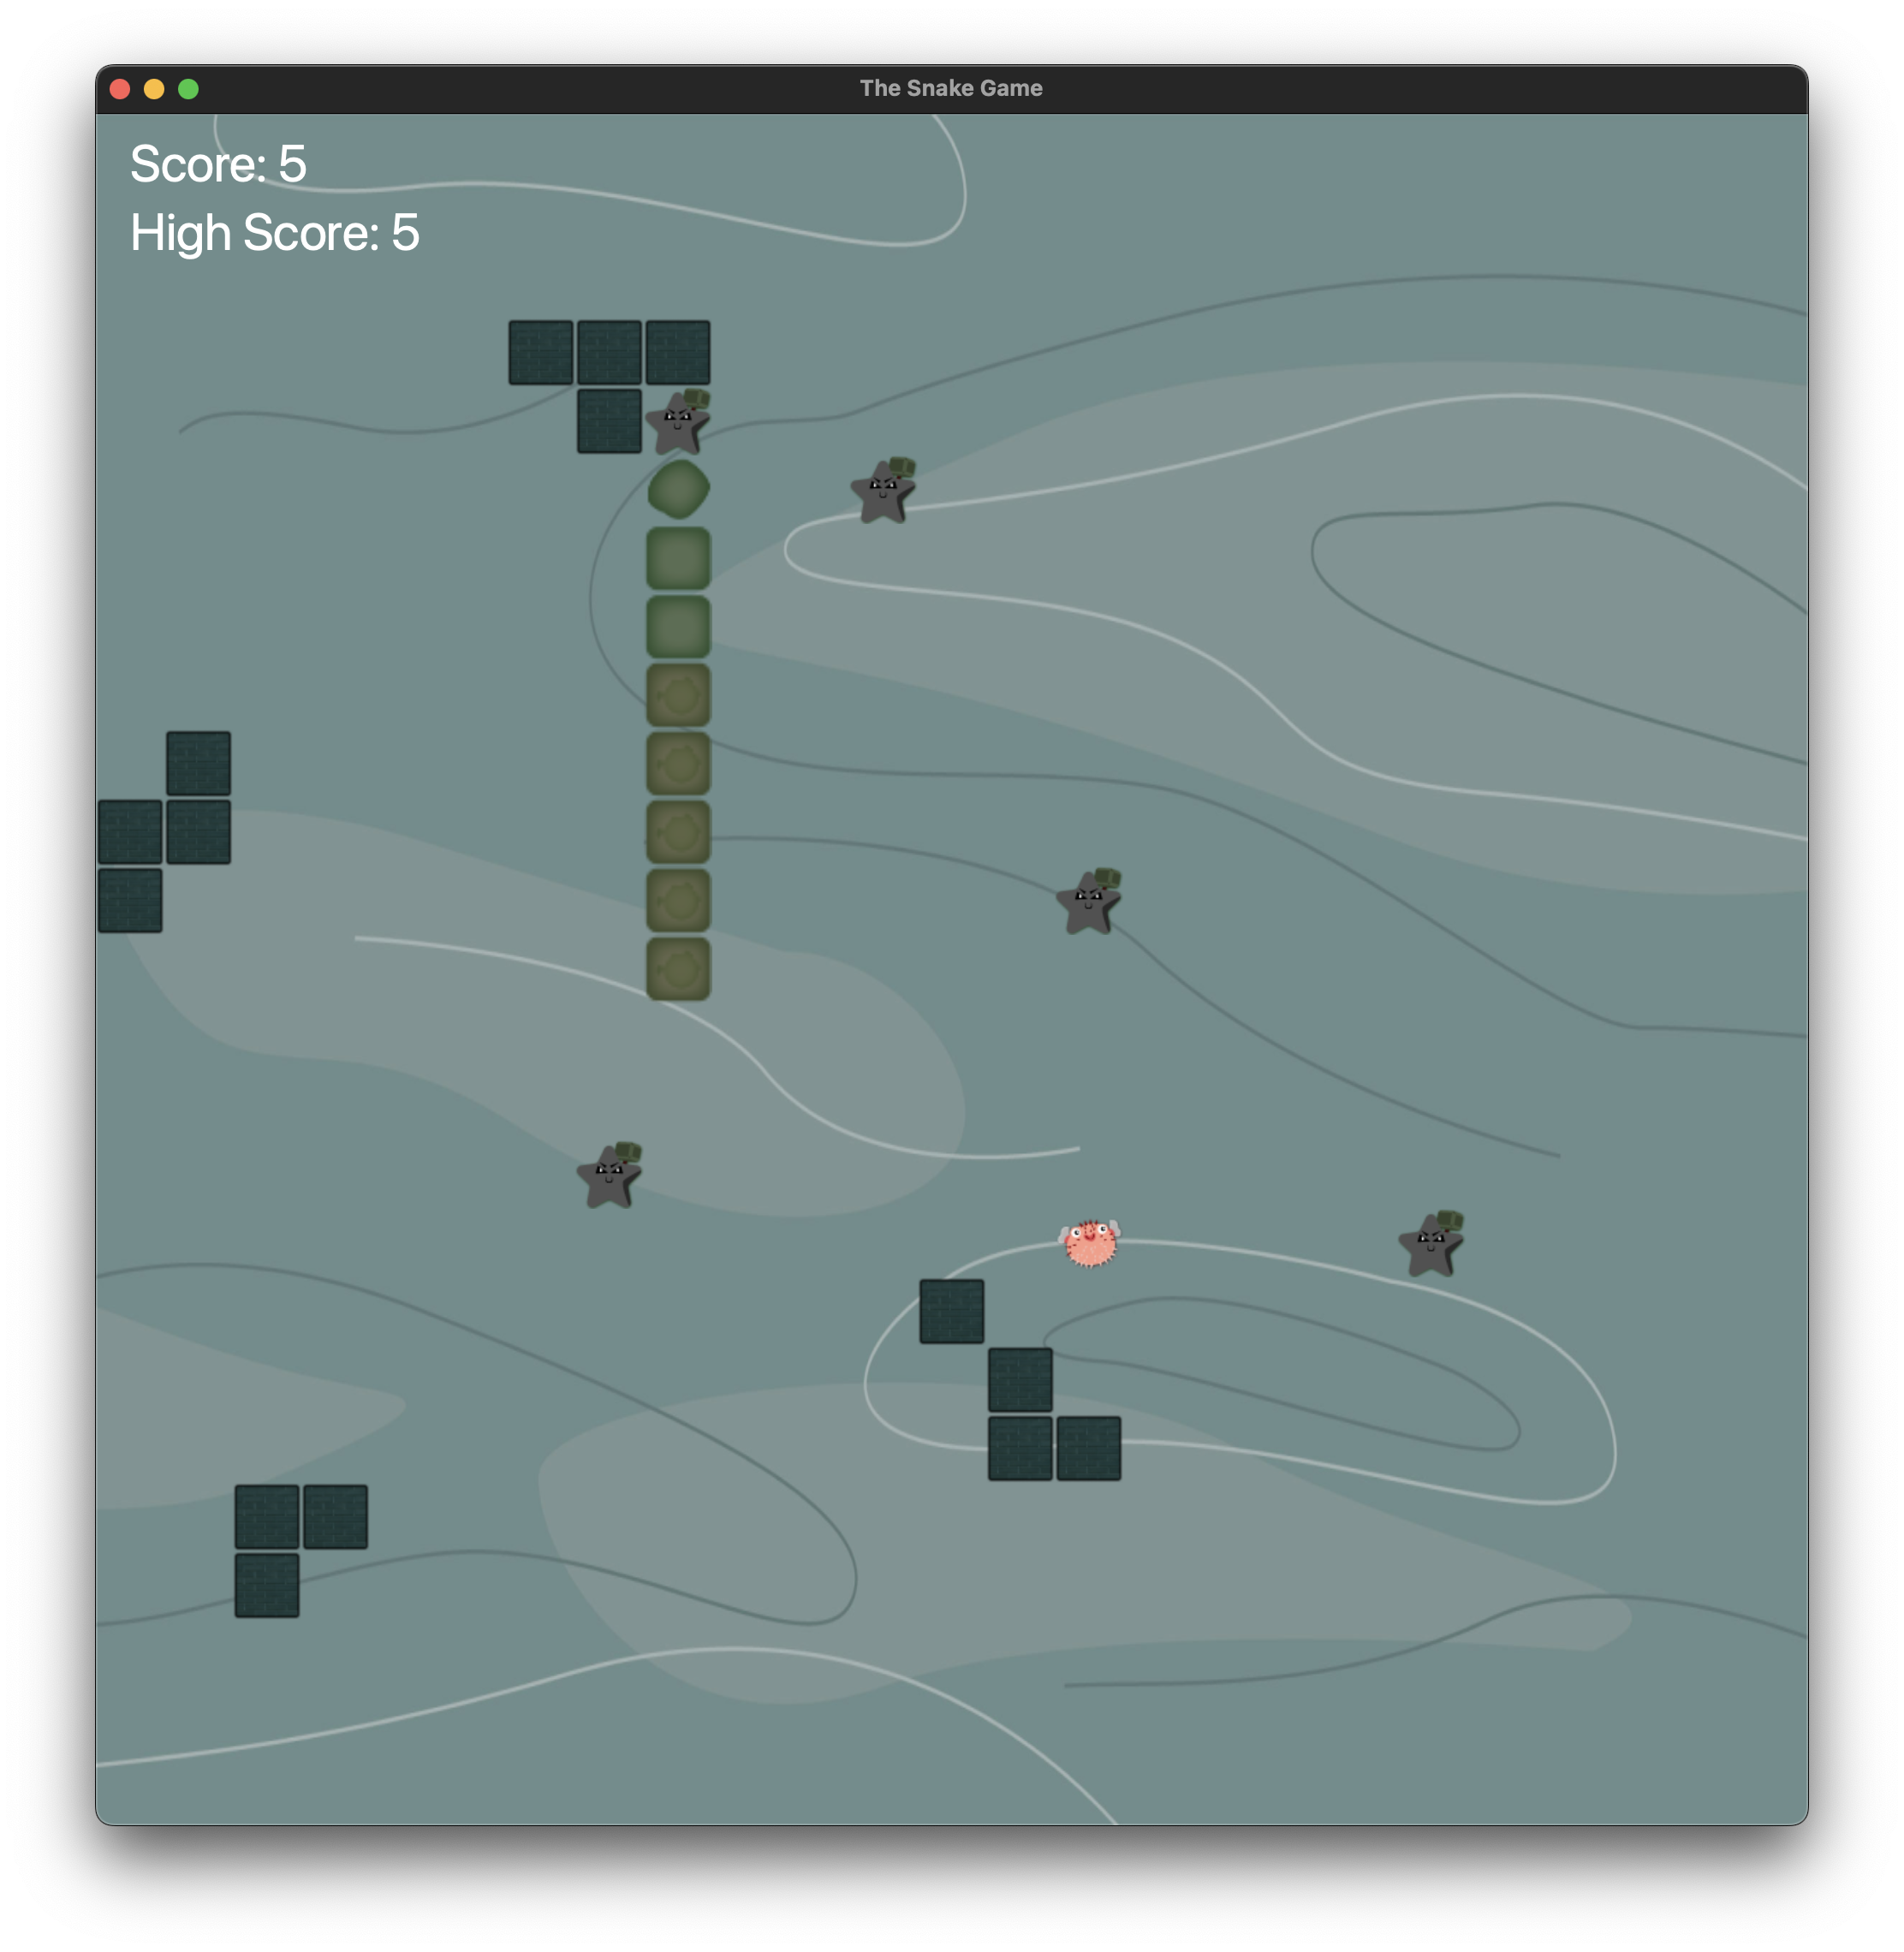
Having clicked on the Start button in the previous screen, the user is redirected to the subsequent Game screen. The screen consists of the following elements:
- The
Gamescreen- The
Scoressection (top left corner)- The current score
- The maximum score
- The generated terrain (the game board)
- The snake (and its parts)
- The consumables (food)
- The ‘Trons’ (enemies)
- The obstacles (walls, blocks)
- The
Table of The Game Elements
| Element | Description | Image |
|---|---|---|
| Snake’s head | The snake’s head represents the snake’s orientation controlled by the user. |  |
| Snake’s body piece (default) | A single piece of the snake’s body. |  |
| Snake’s body piece (with food) | A single piece of the snake’s body with food - the snake’s length increases by one unit for each food eaten. |  |
| ‘Puffer Fish’ (consumable, food) | The ‘Puffer Fish’ is a consumable that the snake can eat. The snake’s length increases by one unit for each ‘Puffer Fish’ eaten. |  |
| ‘Tron’ (enemy) | The ‘Tron’ is an enemy that the snake can collide with. The snake dies if it hits a ‘Tron’. |  |
| Cluster of blocks (obstacle) | The cluster of blocks is an obstacle that the snake can collide with. The snake dies if it hits a cluster of blocks. |  |
Game Mechanics
The game is based on the principles of the traditional snake game. The snake’s orientation on the game’s board, particularly, at the snake’s head, is controlled by the user. The snake’s orientation is changed by pressing the corresponding keys:
W- the snake’s orientation is changed toUPA- the snake’s orientation is changed toLEFTS- the snake’s orientation is changed toDOWND- the snake’s orientation is changed toRIGHT
Instead of using the W, A, S, D keys, the user can also use the UP, LEFT, DOWN, RIGHT arrow keys respectively.
The goal of the game is to eat as much food as possible. The snake’s length increases by one unit for each food eaten. The snake’s length is limited by the game’s board. If the snake’s length reaches the maximum length of the game’s board, the snake dies. The snake dies if it hits an enemy, i.e., a ‘Tron’ or the obstacles. Furthermore, the snake dies if it hits itself. Ultimately, the snake dies if it hits the game’s board’s boundaries, i.e., the walls.
Upon eating the consumable, the score of the player is incremented by a single unit. Moreover, a new consumable is generated on the game’s board. The consumable is generated at a random position on the game’s board. The consumable is generated at a position where there is no snake part, no ‘Tron’ and no obstacle; hence, the consumable is generated at a position where the snake can eat it. Simultaneously, the position of the enemies, i.e ‘Trons’ is randomly changed.
An example of a demo of the game is shown below:
Game Over
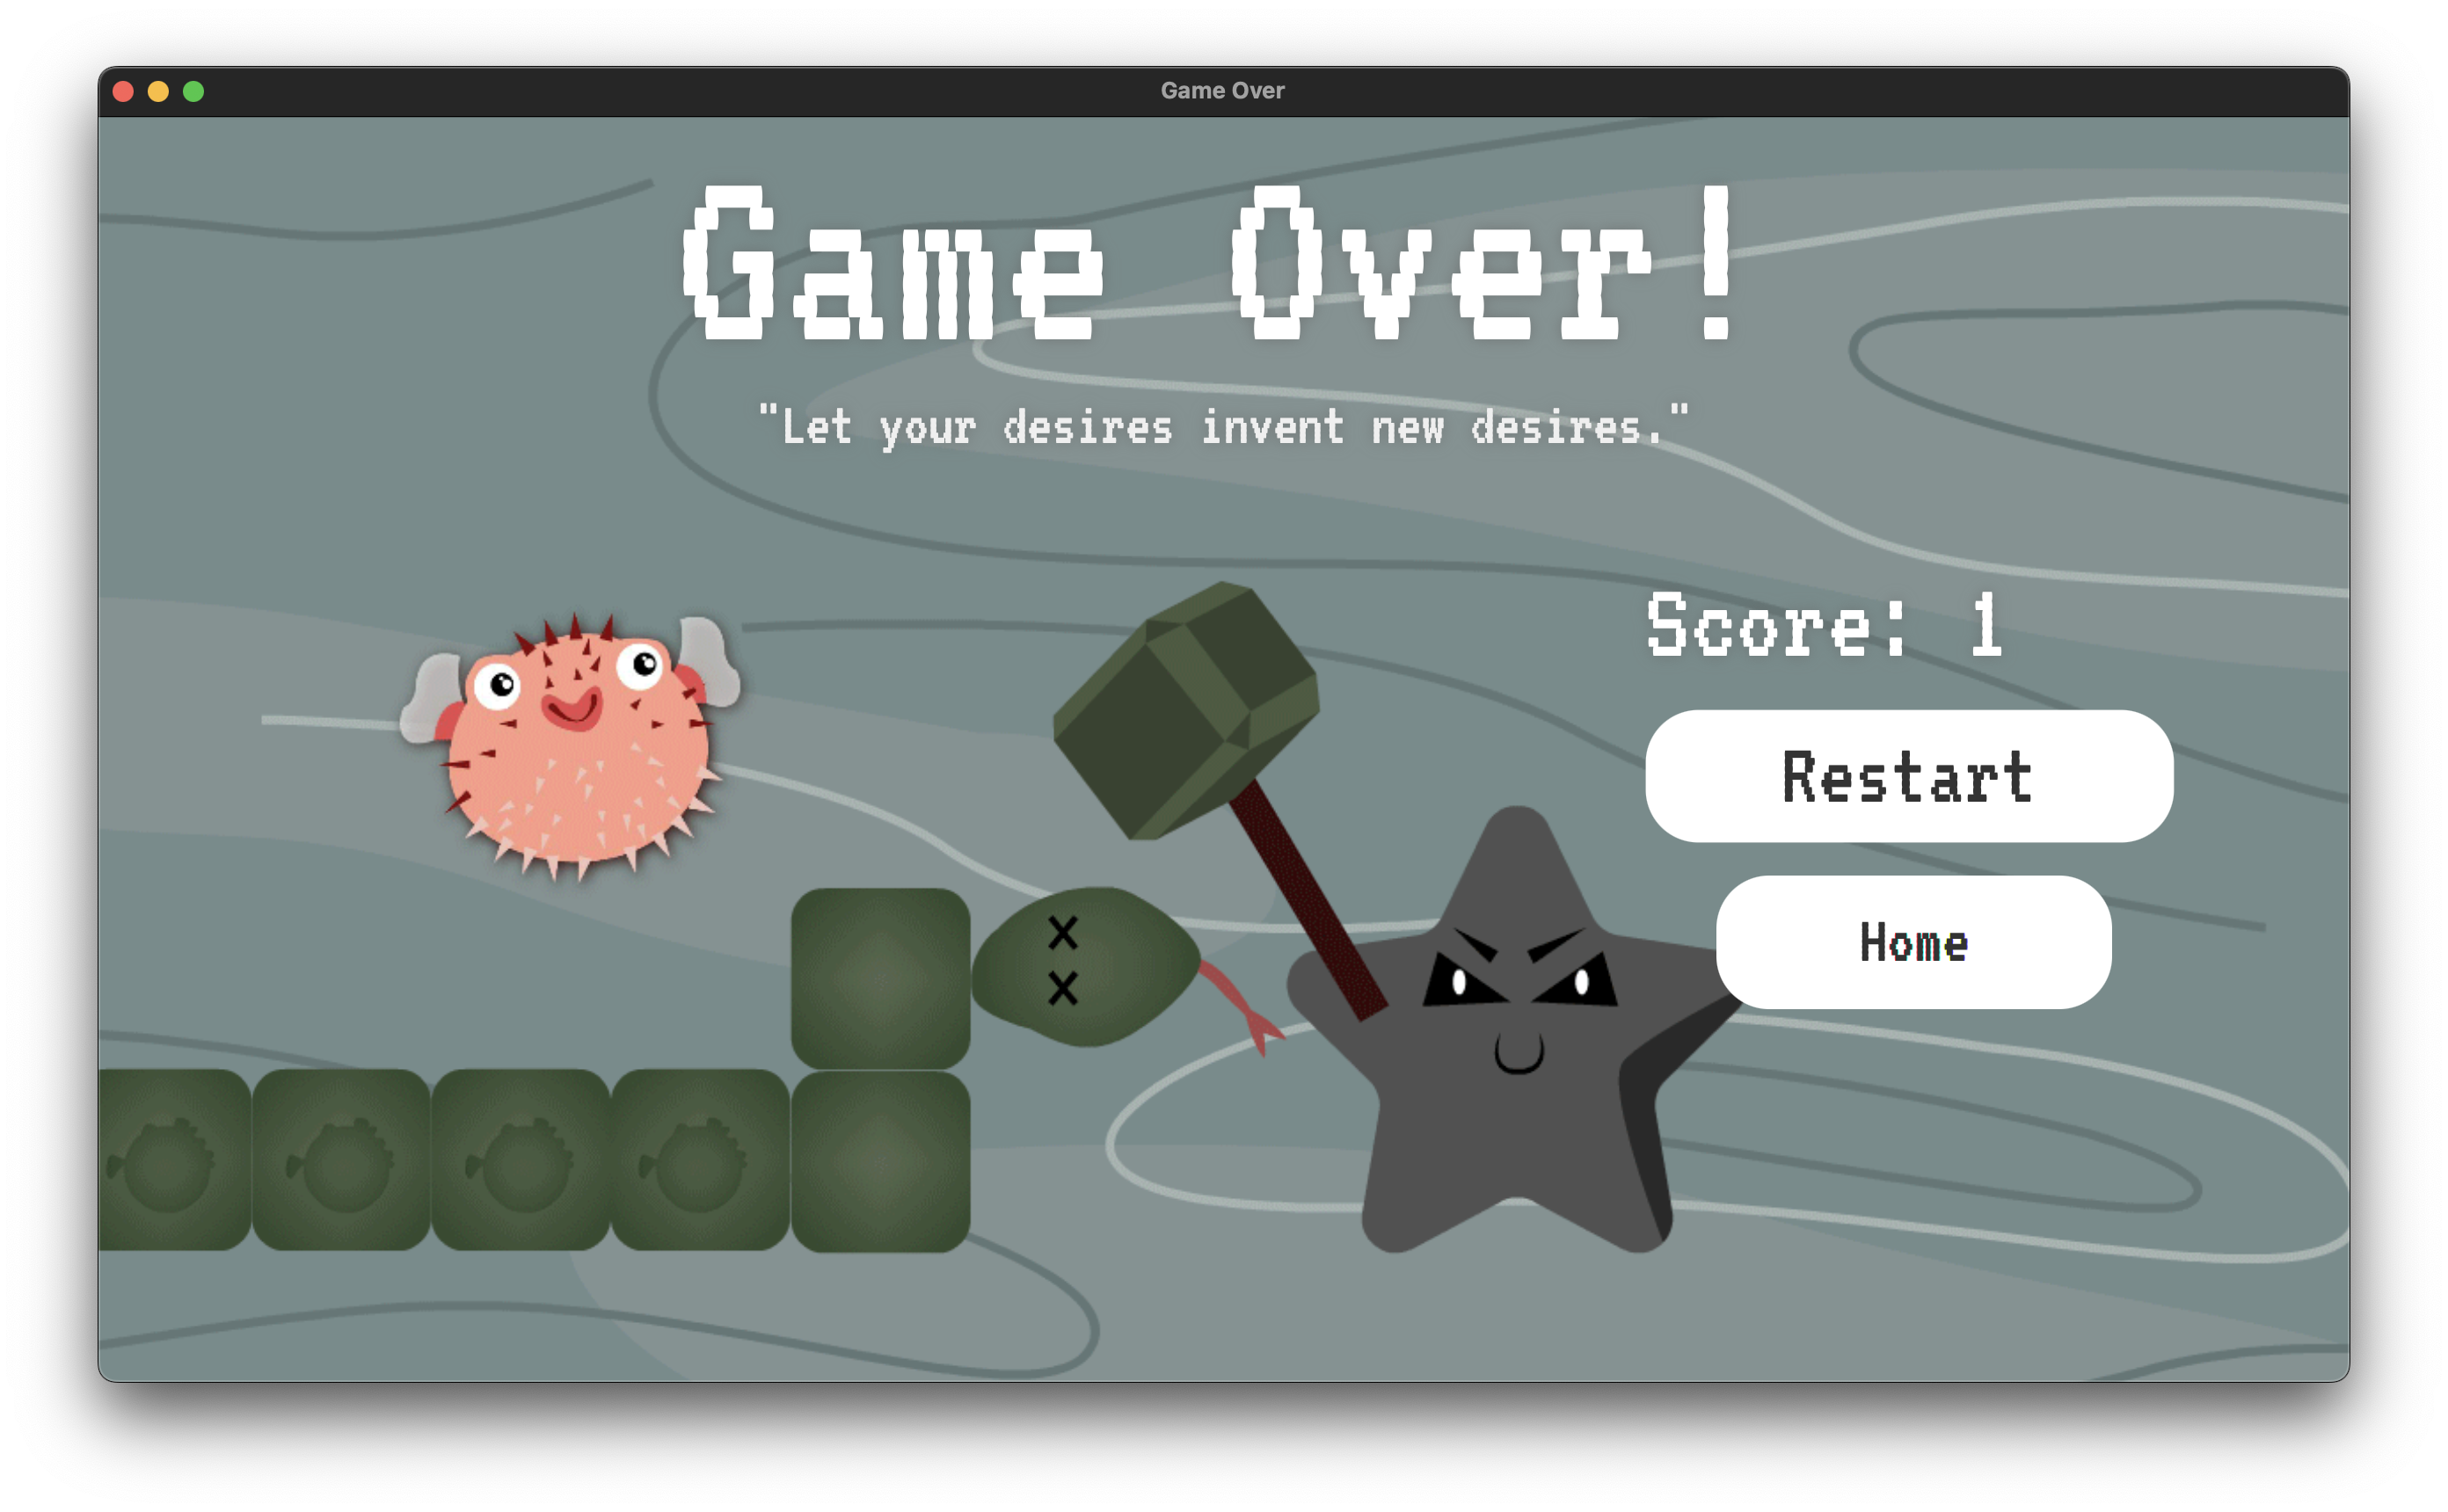
Lastly, the user is redirected to the GameOver screen upon ‘dying’ (for one of the reasons mentioned in the previous section). The screen consists of the following elements:
- The
GameOverscreen- A randomly generated quote
- The current score (the score of the player at the moment of death)
- The restart button (restarts the game)
- The home button (redirects the user to the
Menuscreen)
Additional
The following section contains some additional information and features of the game.
Predefined Levels
The game comes with five pre-defined levels that the user can choose from. These have enabled us to effectively test and demo the game (as part of the development process).
Playing a particular level is fairly easy. The user can select the level by choosing the corresponding run configuration within the IDE which shall preload the game with the specified level’s attributes whilst compiling and running the software. The following list contains the corresponding run configurations for each level that comes with the game:
levels/SnakeLevel1- Chilly Meadows,levels/SnakeLevel2- Tunnel Trouble,levels/SnakeLevel3- Linear Chaos,levels/SnakeLevel4- Diagonal Maze,levels/SnakeLevel5- Snake Parade.
Levels Preview

Understanding the Level’s Run Configurations
Each level is stored as a JSON[3] file under resources/levels/ directory. One would argue, why a new run configuration is needed for every level? Put simply, upon running the software, we provide a command-line argument with the desired level’s name; hence, a new run configuration is needed for every level (where each configuration contains a different command-line argument of the level). The command-line argument is used to preload the game with the specified level’s attributes from a JSON source. The command-line argument is passed to the main method of the SnakeMain class.
Custom Levels
Besides the pre-defined levels, the user can also create their own levels. The purpose may be to test the game’s functionalities or, simply, for fun. The user can create their own levels by creating a JSON file with a distinct name under resources/levels/ directory. As part of the software, a parser of JSON files is implemented to interpret such source files to the game’s level attributes. The JSON file must contain the following attributes (these are just some dummy values, in the example, for documentation purposes); keep in mind that the comments are not part of the JSON file (they are only for the sake of explanation):
{
  "id": "some-unique-id",
  "name": "some-level-name",
  "gameState": {
    "sessionScore": 0, // the score of the player
    "direction": "any-direction", // UP, DOWN, LEFT, RIGHT
    "foodX": 1, // the x-coordinate of the food
    "foodY": 1, // the y-coordinate of the food

    "snake": [
      {
        "x": 5, // the x-coordinate of the snake's head
        "y": 0, // the y-coordinate of the snake's head
      }
      // the snake's body (comma-separated)
    ],

    "enemy": [
      {
        "x": 0, // the x-coordinate of the enemy
        "y": 0, // the y-coordinate of the enemy
      }
      // more enemies (comma-separated)
    ],

    "block": [
      {
        "x": 0, // the x-coordinate of the obstacle
        "y": 0, // the y-coordinate of the obstacle
      }
      // more obstacles (comma-separated)
    ]
  }
}
Secondly, we need to ‘tell’ the game to recognize such a file as a level for the game. Thereby, the user must navigate to the SnakeGameUtils.java file (under java source directory) and add the following line of code (line 65):
public static final Map<String, String> JSON_SOURCES = new HashMap<>() ;
Lastly, create a new run configuration for the new level, where the user passes the name of the level as the command-line argument (as mentioned in the previous section). Passing command-line arguments in IntelliJ[4]. The passed command-line argument must correspond to the name of the JSON file (without the .json extension).
NOTE: the structure, such as the key names of the JSON file, must be the same as the one shown above. The values of the attributes can be changed to the desired ones. Albeit bear in mind that the values of the attributes must be valid. For example, the x and y coordinates of the snake’s head, body must be within the game’s board’s boundaries (the same, virtually, applies to the enemies and obstacles). The path path/to/resources/ is supposed to represent the path to the resources directory of the project.
Additional Features
A further set of features are implemented in the game. These features are not part of the game’s core functionalities, but rather, they are additional features that enhance the user’s experience. These features are:
Adjusting the Game’s Preferences
Similarly to creating custom levels (as mentioned in the previous section), the user can likewise adjust the game’s preferences, such as the game’s speed or the settings of the interface. The user can do so by altering the config.json file found under resources folder. The file must contain the following attributes (with the default values):
{
  // these are the default values
  "gameSettings": {
    "initialSnakeSize": 3,
    "cellSize": 40, // in pixels
    "rows": 25,
    "columns": 25,
    "speed": 8,
    "upperPadding": 2
  }
}
Note: the structure, such as the key names of the JSON file, must be the same as the one shown above. The values of the attributes can be changed to the desired ones. Albeit bear in mind that the values of the attributes must be valid. For example, the rows and columns attributes must be greater than zero.

Appendix
References
- [1] JDK 17 Installation guide
- [2] Latest IntelliJ IDEA installation guide
- [3] JavaScript Object Notation (JSON) - json.org
- [4] Passing command-line arguments in IntelliJ IDEA
Closing Remarks
The navigation from gameOver to menu takes too long
This is a known issue. The reason is that the menu scene is loaded with a gif image as background. This image is quite heavy and takes a lot of time to load. Hence, the user has to wait for the image to load before being able to access the
menu scene. However, since the user does not have to access this scene often, i.e., the game can be restarted from the gameOver scene, this issue is not considered
as a priority. Though, it is documented here for future reference.